
Vooster MCP Setup + Getting Started with Development
How to connect Vooster MCP to Claude Code and Cursor in 5 minutes. Step-by-step guide from @vooster/mcp package setup to API key configuration and implementing your first task.
Planning Done, But How Do I Start Coding?
"Great, I've created the PRD and completed the TRD. Now what?"
You've fleshed out your idea in Vooster AI and automatically generated seven planning documents. Your tasks are neatly broken down. But when you're ready to start coding, it feels overwhelming. How do you convey all this context to your AI coding tool?
Remember Vooster AI's 7-step workflow?
1️⃣ Enter your idea in Vooster AI 2️⃣ (Optional) Apply FullSaaS template 3️⃣ Collaborate with AI planner agent 4️⃣ 7 documents + prompts generated! 5️⃣ Connect Vooster AI MCP ← You are here! 6️⃣ Command: "vooster-ai, implement this" 7️⃣ Done
This article covers step 5 — MCP integration — all the way to actually starting development. You can complete it in 5 minutes. No complex setup. Just one simple JSON file.
If you're curious about what MCP is, read "AI Coding Tools in 2025: $40B Invested, But Here's How to Actually Use Them Right" first.
Prerequisites - Verify Vooster Planning Complete
Before integrating MCP, make sure your planning is complete in Vooster AI.
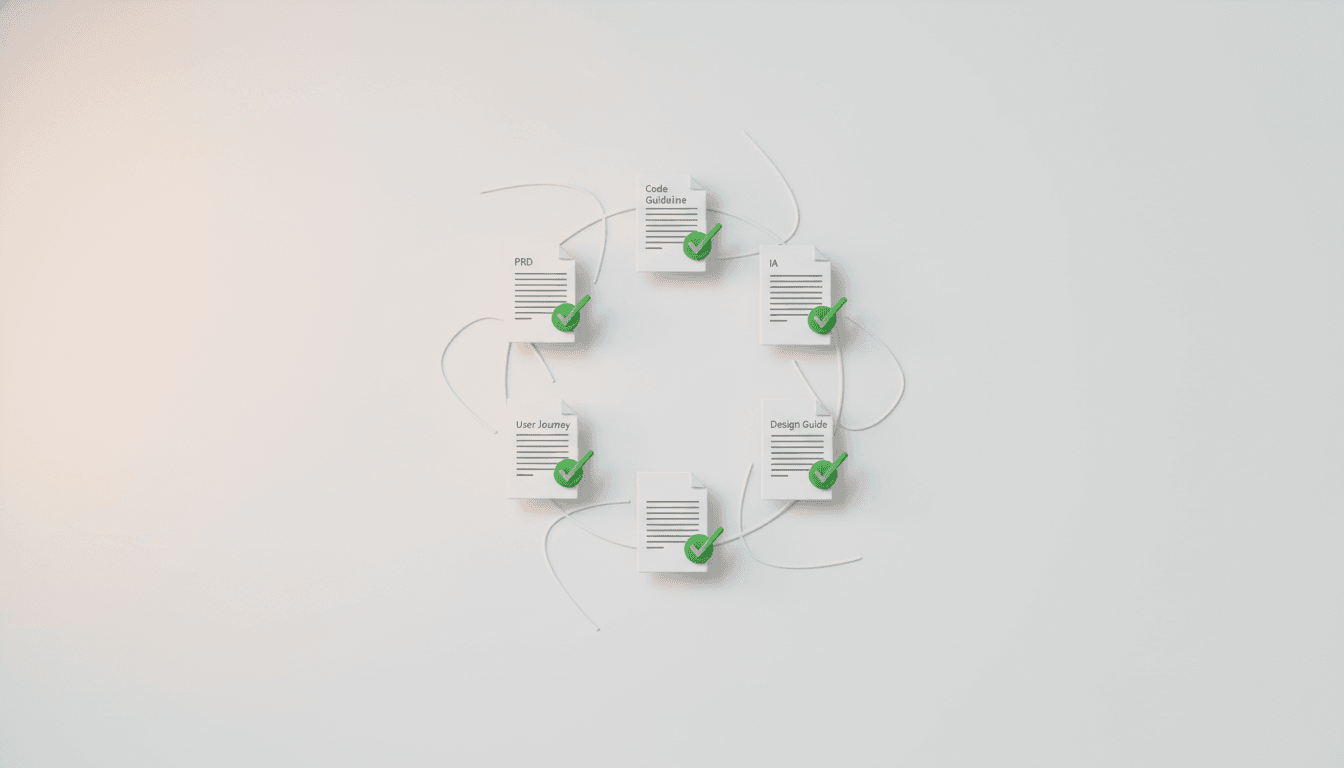
Check All 7 Documents Generated
In the Vooster AI dashboard, verify that all of these documents have been created:
- PRD (Product Requirements Document) - Defines product requirements
- TRD (Technical Requirements Document) - Tech stack and architecture
- User Journey - Visualizes user flows
- ERD (Entity Relationship Diagram) - Database design
- Design Guide - Colors, typography, UI components
- IA (Information Architecture) - Sitemap, navigation
- Code Guideline - Coding rules and conventions
These documents are the blueprint that your AI coding tool will read. If they're not complete, finish your planning in Vooster AI first.
Confirm Task Breakdown Complete
Check the task list in Vooster AI's Kanban board. You should see specific tasks like "Implement user registration feature" or "Integrate payment system."
If tasks haven't been broken down yet, collaborate with the AI planner agent to refine them. You can find detailed instructions in the Beginner's Guide to Building a Next.js SaaS.
Get Your API Key

You'll need a Vooster API key for MCP integration. Getting one is very simple.
How to Generate
- Go to Vooster AI dashboard (vooster.ai)
- Click your profile in the top-right corner → Settings
- Navigate to the API Keys tab
- Click the "Generate New API Key" button
- Copy the generated key and store it safely
⚠️ Important: The API key is displayed only once. After copying, save it in a secure location. If you lose it, you'll need to generate a new one.
Security Notes
- Don't commit your API key to Git
- Store it in a
.envfile and add to.gitignore - If the key is exposed, regenerate it immediately
Connect MCP in Claude Code
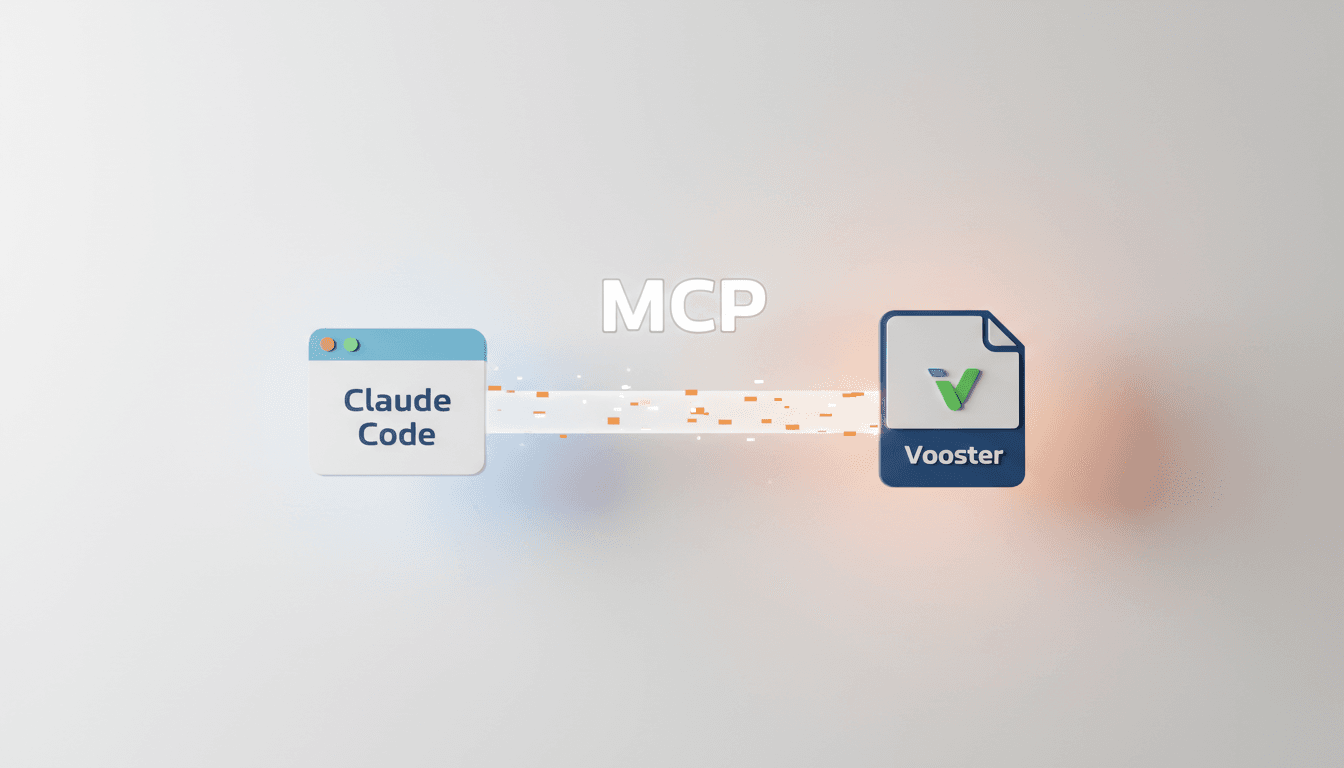
Claude Code is Anthropic's official CLI tool. It runs in the terminal and specializes in understanding your entire project.
Create Configuration File
Create a .mcp.json file in your project's root directory:
{
  "mcpServers": {
    "vooster-ai": {
      "command": "npx",
      "args": ["-y", "--package=@vooster/mcp@latest", "vooster-ai", "--api-key=YOUR_API_KEY"],
      "type": "stdio"
    }
  }
}
Replace YOUR_API_KEY with the actual API key you generated earlier.
Verify Connection
- Restart Claude Code
- Start a new conversation
- Type "Show me my project list"
- If your Vooster AI project list appears, the connection was successful!
Troubleshooting
Q: I'm getting an "mcpServers not found" error
A: Make sure the .mcp.json file is in the project root. It won't be recognized in subfolders.
Q: I'm getting an "Authentication failed" error A: Verify that your API key is correct. It shouldn't include spaces or quotes.
Connect MCP in Cursor
Cursor is an AI-native editor based on VS Code. It's optimized for real-time code writing and instant AI assistance.
Create Configuration File
Create a .cursor folder in your project root, then create an mcp.json file inside:
mkdir -p .cursor
.cursor/mcp.json file contents:
{
  "mcpServers": {
    "vooster-ai": {
      "command": "npx",
      "args": ["-y", "--package=@vooster/mcp@latest", "vooster-ai", "--api-key=YOUR_API_KEY"],
      "type": "stdio"
    }
  }
}
Again, replace YOUR_API_KEY with your actual key.
Verify in Cursor
- Restart Cursor
- Press Cmd/Ctrl + Shift + P → search for "Settings"
- In the MCP Servers section, check that "vooster-ai" is active
- Type "Show me my Vooster project list" in the AI chat
- If the project list appears, you've succeeded!
Useful Shortcuts
- Cmd/Ctrl + K: Quick AI command
- Cmd/Ctrl + L: Open AI chat
- Cmd/Ctrl + I: Inline AI editing
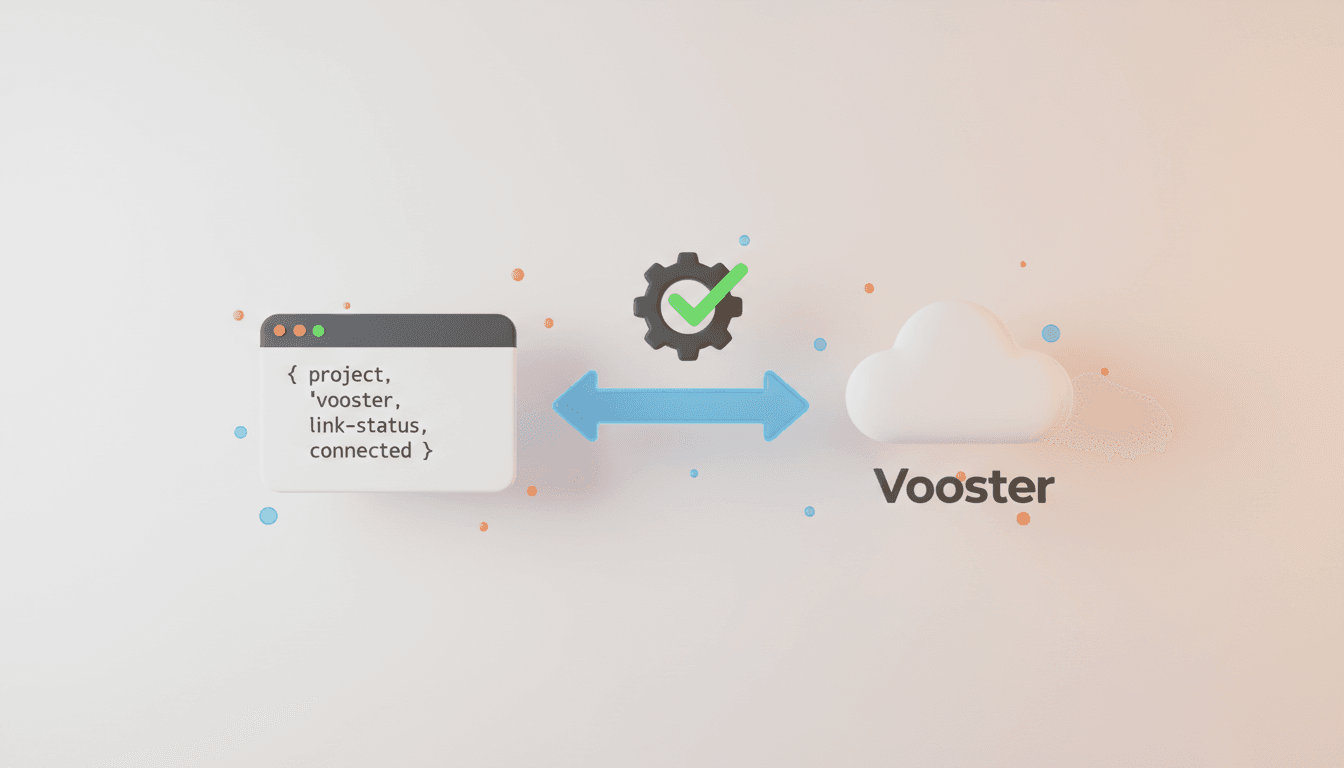
Connect to Your Project
Once MCP integration is complete, you need to select the project you'll work on.
Check Project List
Talk to your AI coding tool like this:
You: "Show me my project list"

AI: [Executes list_projects tool]

Project List:
1. proj_abc123 - E-commerce SaaS
2. proj_def456 - Blog Platform
3. proj_ghi789 - E-commerce Dashboard
Connect to a Project
Copy the project ID you want to work on and connect:
You: "Connect to project proj_abc123"

AI: [Executes connect_project tool]

✅ Connected to "E-commerce SaaS" project.
You can now access PRD, TRD, and Task list.
Test Document Access
Verify the connection worked:
You: "Show me the PRD"

AI: [Executes read_prd tool]

=== Product Requirements Document ===

Project Name: E-commerce SaaS
Target Users: Individual sellers and small business owners

Key Features:
1. Product management system
2. Order and payment processing
3. Customer management CRM
...
If the PRD displays correctly, all setup is complete!
Implement Your First Task ⭐
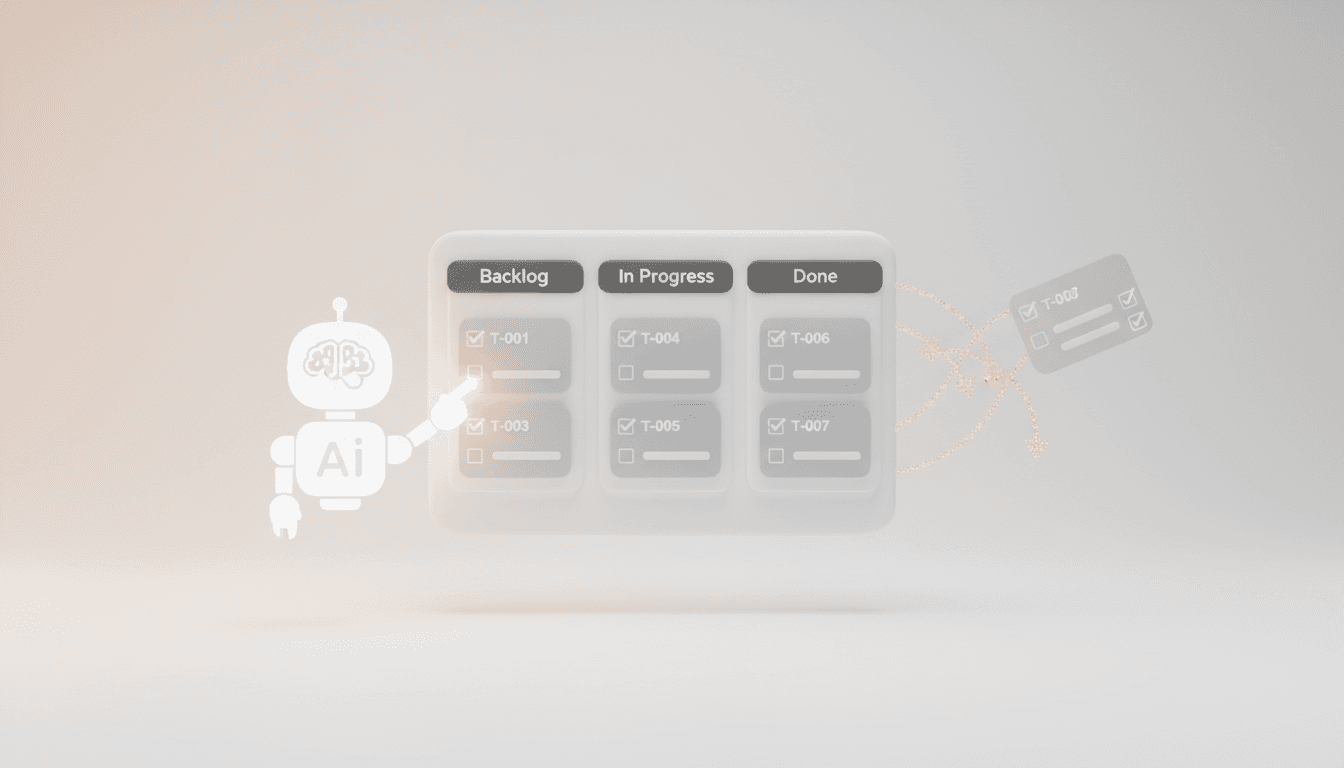
It's finally time to start coding. Just implement the tasks that Vooster AI broke down, one at a time.
Check Your Next Task
Ask the AI for the highest priority task:
You: "What's my next task?"

AI: [Executes get_next_task tool]

🎯 Next Priority Task

🆔 ID: T-001
📋 Title: Implement User Registration Feature
📊 Status: backlog
⏰ Priority: high

📝 Description:
Implement a feature that allows users to register with email and password.
Include email verification using the Clerk authentication library.

✅ Sub-tasks:
1. Implement signup form UI (React Hook Form)
2. Implement email verification logic
3. Clerk integration and setup
4. Update Prisma User schema

💡 Reference Documents:
- PRD Section 3.1: User Authentication
- TRD Section 2.3: Clerk Setup
- Design Guide: Form Component Styles
Start Implementing the Task
Ask the AI to implement it:
You: "Implement T-001"

AI: "Sure, I'll start implementing task T-001 'Implement User Registration Feature.'

I've reviewed the relevant documents:
- According to the PRD, email verification is required
- The TRD recommends using the Clerk library
- Following the Code Guideline, I'll use React Hook Form

Implementation order:
1. Install and configure Clerk
2. Create signup form component
3. Implement email verification flow
4. Update Prisma schema

Shall I begin?"

You: "Yes, start"

AI: [Starts writing actual code]

✅ Step 1/4: Clerk installation complete
✅ Step 2/4: SignUpForm component created
✅ Step 3/4: Email verification logic implemented
✅ Step 4/4: Prisma schema updated

Task T-001 is complete!
Testing instructions:
1. Run `pnpm dev`
2. Go to /signup page
3. Enter email and check verification email
Key Points
With MCP:
- AI automatically references PRD and TRD
- Follows Code Guideline for consistent code
- Adheres to Design Guide when implementing UI
- No need to explain context every time
Just one line, "Implement T-001," is enough!
Update Task Status
When work is complete, update the status:
You: "Mark T-001 as done"

AI: [Executes update_task_status tool]

✅ Task T-001 status changed to 'done'.

Next priority task:
🆔 ID: T-002
📋 Title: Implement Login Feature
The Kanban board in Vooster AI dashboard also updates in real-time!
Using the FullSaaS Template
If you're a MAX plan user, take advantage of the FullSaaS template. Combined with MCP, your development speed increases by 3x or more.
What's Included in FullSaaS Template
- Complete authentication system: Clerk-based signup/login
- Subscription payments: Stripe integration for SaaS billing ready
- Admin dashboard: User management, analytics, settings pages
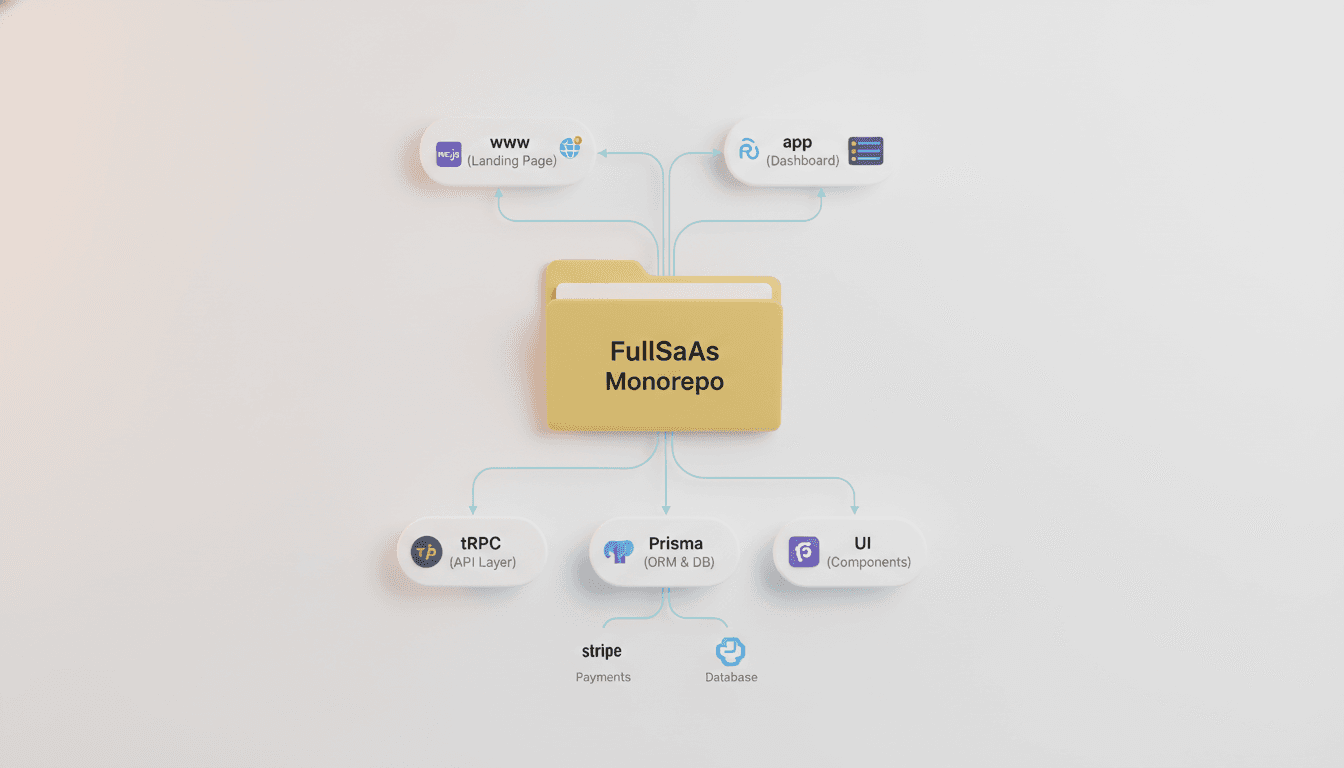
- Monorepo structure:
apps/www: Landing page (Next.js)apps/app: Dashboard (Next.js)packages/*: Shared libraries
- tRPC API: Type-safe API communication
- Prisma ORM: PostgreSQL database management
Benefits of MCP + FullSaaS Combination
Using MCP alone without template:
- AI must create project structure from scratch
- Time wasted on setup files, auth, DB connections, etc.
- Token costs ↑, possibility of errors ↑
Template + MCP combination:
- Proven code structure already complete
- AI focuses only on business logic implementation
- Token costs ↓, development speed ↑↑↑
How to Apply the Template
When creating a project in Vooster AI, select the "Use FullSaaS Template" option. AI will automatically generate PRD and TRD tailored to the template structure.
MCP Tools Overview
Here's a summary of the tools Vooster MCP provides. The AI uses them automatically, but knowing them helps make conversations more precise.
| Category | Tool | Description |
|---|---|---|
| Project | list_projects | List all projects |
connect_project | Connect to a specific project | |
disconnect_project | Disconnect from project | |
| Document Reading | read_prd | Read PRD document |
read_trd | Read TRD document | |
read_code_guideline | Read coding guidelines | |
read_design_guide | Read design guide | |
read_user_journey | Read user journey | |
read_erd | Read ERD diagram | |
read_ia | Read IA document | |
| Tasks | list_task | List all tasks |
get_next_task | Get next priority task | |
get_task | Get specific task details | |
update_task_status | Update task status (backlog/in_progress/done) |
Practical Usage Examples
# Switch projects
"Switch to proj_def456"

# Check specific document
"Show me just the database design section from the TRD"

# Filter tasks
"Show me only backend-related tasks"

# Next 3 priority tasks
"Tell me the next 3 tasks to do"

# Search tasks
"Find tasks related to login"
Conclusion - 7 Steps Complete, Only Implementation Left
We've covered how to integrate Vooster MCP. Let's recap the 7-step workflow:
1️⃣ Enter your idea in Vooster AI ✅ 2️⃣ (Optional) Apply FullSaaS template ✅ 3️⃣ Collaborate with AI planner agent ✅ 4️⃣ 7 documents + prompts generated! ✅ 5️⃣ Connect Vooster AI MCP ✅ ← Completed in this article! 6️⃣ Command: "vooster-ai, implement this" ← Now here! 7️⃣ Done
What You Can Do in 5 Minutes
- ✅ Generate API key (1 min)
- ✅ Set up MCP in Claude Code or Cursor (2 min)
- ✅ Connect and verify project (1 min)
- ✅ Start implementing first task (1 min)
Total: 5 minutes to complete all preparation from planning to coding.
With Vooster AI
- No need to explain your project to AI every time
- PRD and TRD automatically reflected in code
- Consistent code quality and style maintained
- Systematic development with task-based workflow
Good code starts with good planning. Vooster AI creates the plan, MCP connects it to AI, and your AI coding tool executes.
From idea to implementation, AI accompanies every step.
Start Now
Get started for free at Vooster AI:
- Refine your idea through conversations with AI planner
- Auto-generate 7 documents
- Connect MCP to Claude Code/Cursor
- Start development with a single question: "What's my next task?"
Related Articles
- AI Coding Tools in 2025: $40B Invested, But Here's How to Actually Use Them Right
- Beginner's Guide to Building a Next.js SaaS
Turn your idea into reality today with Vooster AI!
Start Structured Vibe Coding with Vooster
From PRD generation to technical design and task creation - AI helps you every step. Start free today.
PRD Generation
Auto-generate detailed requirements
Technical Design
Implementation plan & architecture
Task Generation
Auto-break down & manage dev tasks
No credit card required · Full access to all features
Related Posts

How to Maximize Claude Code and Cursor with MCP Integration in 2025
Learn the secret to leveraging AI coding tools like Claude Code and Cursor effectively through MCP integration and proper context management.

How to Prevent AI Hallucinations with Step by Step Rule
Learn how a 3-step process (Explore → Plan → Execute) prevents AI coding errors and ensures better results with Vooster AI's Step by Step rule.

Why You Should Keep Updating Cursor Rules
Learn why continuously updating Cursor rules is essential for maintaining AI code quality and preventing bugs in evolving projects.